From a model to Pi#
You need a Linux NVIDIA machine, uv and, for the Pi step, rootless Podman. Run the shell commands below in a terminal on that machine, outside any container. Use the browser for the panel steps.
For DLS users
Load uv through the DLS module system in your shell:
module load uv
Store downloaded models on scratch to keep large model files out of your home
directory. If ~/models does not already exist, replace <fedid> with your FedID
and run:
mkdir -p /scratch/<fedid>/models
ln -s /scratch/<fedid>/models ~/models
Install and open the panel:
uv tool install --upgrade lllm2
lllm2 engines install cuda
lllm2
Open http://127.0.0.1:8082. Keep the panel running.
When a newer lllm2 release is published, the panel shows a banner with the
commands to upgrade: uv tool upgrade lllm2, then lllm2 engines install cuda
when the release brings a new llama.cpp build. Restart the panel afterwards.
Set LLLM2_UPDATE_CHECK=0 to turn the daily check off.
1. Download a model#
Scroll to My catalogue on Launch model and click Queue download beside a model. To find another model, click Find models in the navigation bar near the top of the panel, enter its name in Search Hugging Face, click Find models, then Add to catalogue on the variant you want.
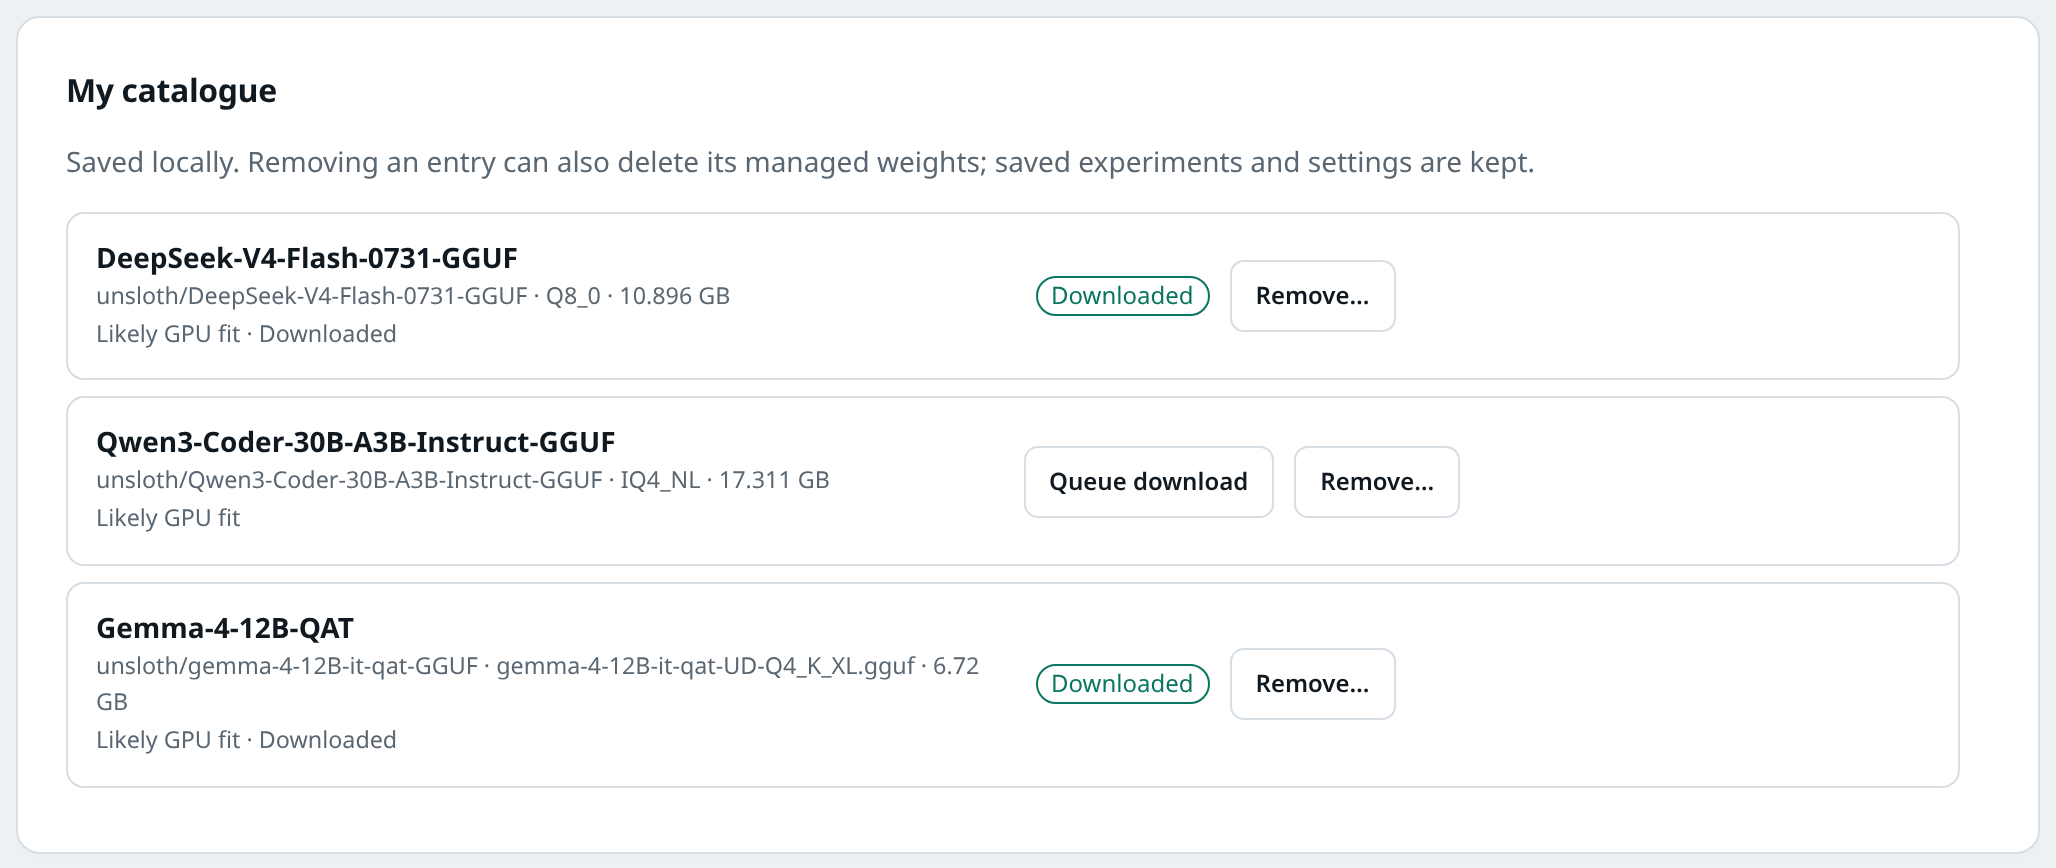
Queue a download from My catalogue.#
Once the download finishes, select the model under Choose a model on the same page (Find more models → opens the Hugging Face search). Already downloaded one? Start here.
2. Find its context window#
With your model selected, click Experiments in the top navigation. Check the model name in Experiment configuration; Use launch settings copies your current Launch settings if needed. Scroll down to the Experiments card. Leave Discover usable context checked and click Run baseline below the workload options. Progress appears in Queue & engine below it. Wait for the run to finish; each load check takes a few seconds.
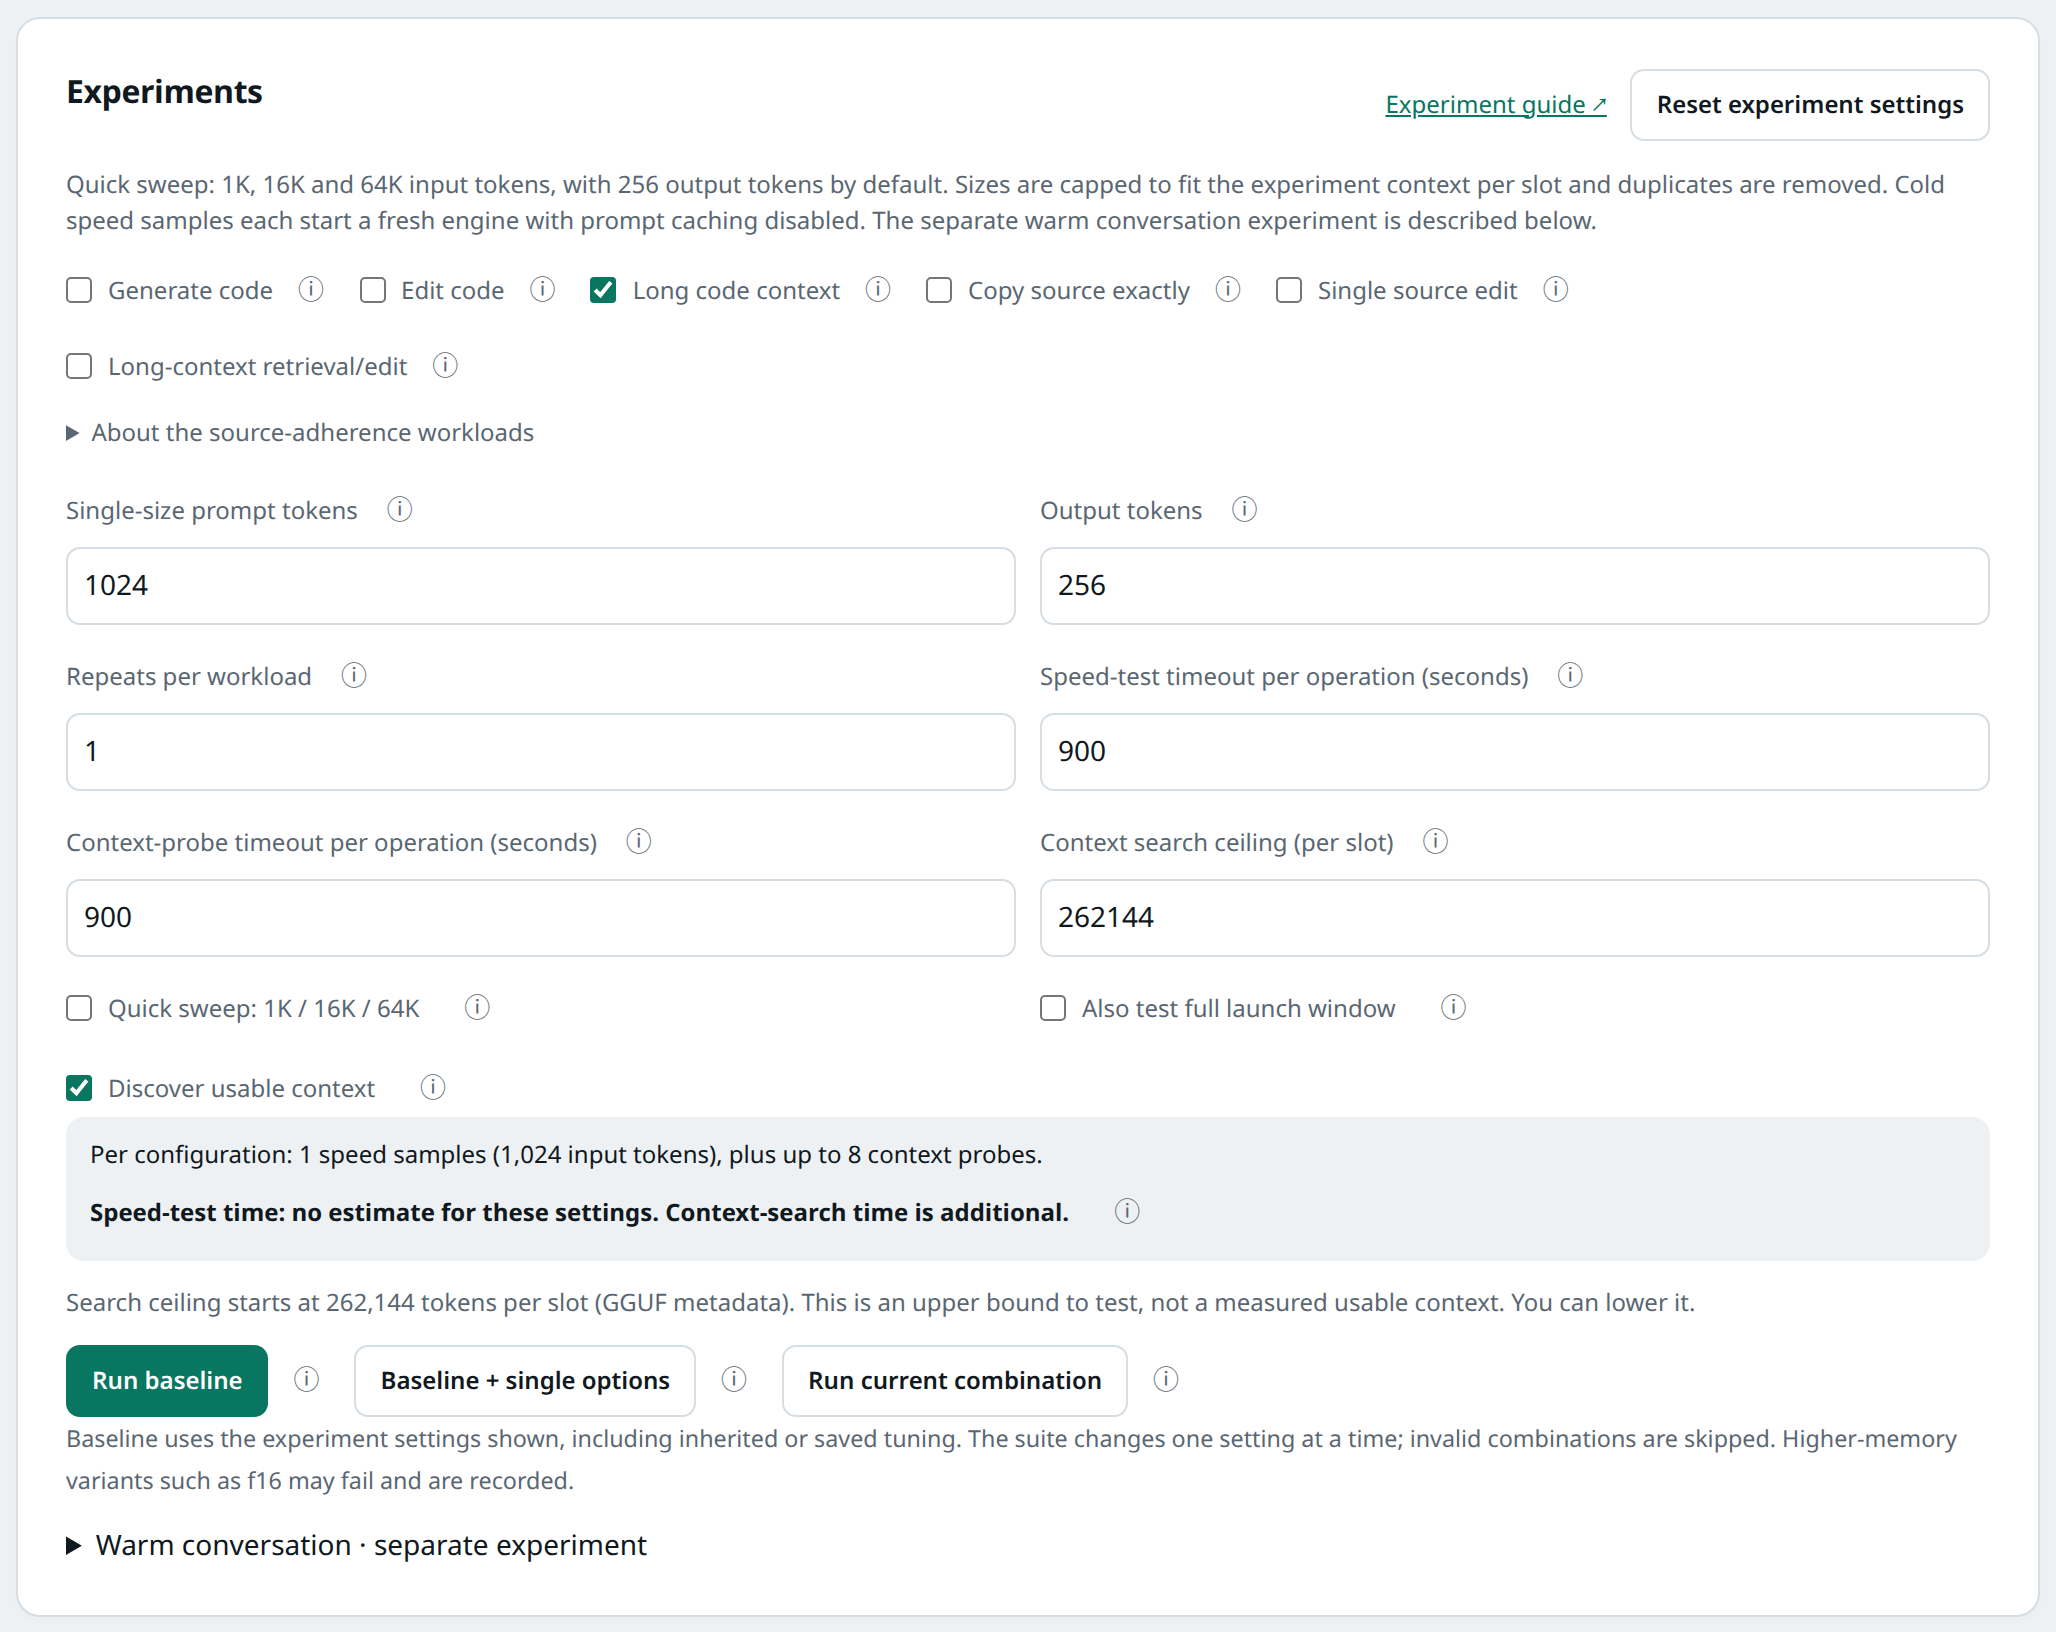
Keep the defaults for your first baseline.#
Scroll further down to Experiment history. Click the ▸ at the start of the completed run’s row to expand it. Leave Loaded selected under Context and click Try in Launch to use the largest window that loaded. 90% leaves some headroom; Original keeps the experiment’s original context. A run that also confirmed the window with a full prompt shows Tested in place of Loaded.
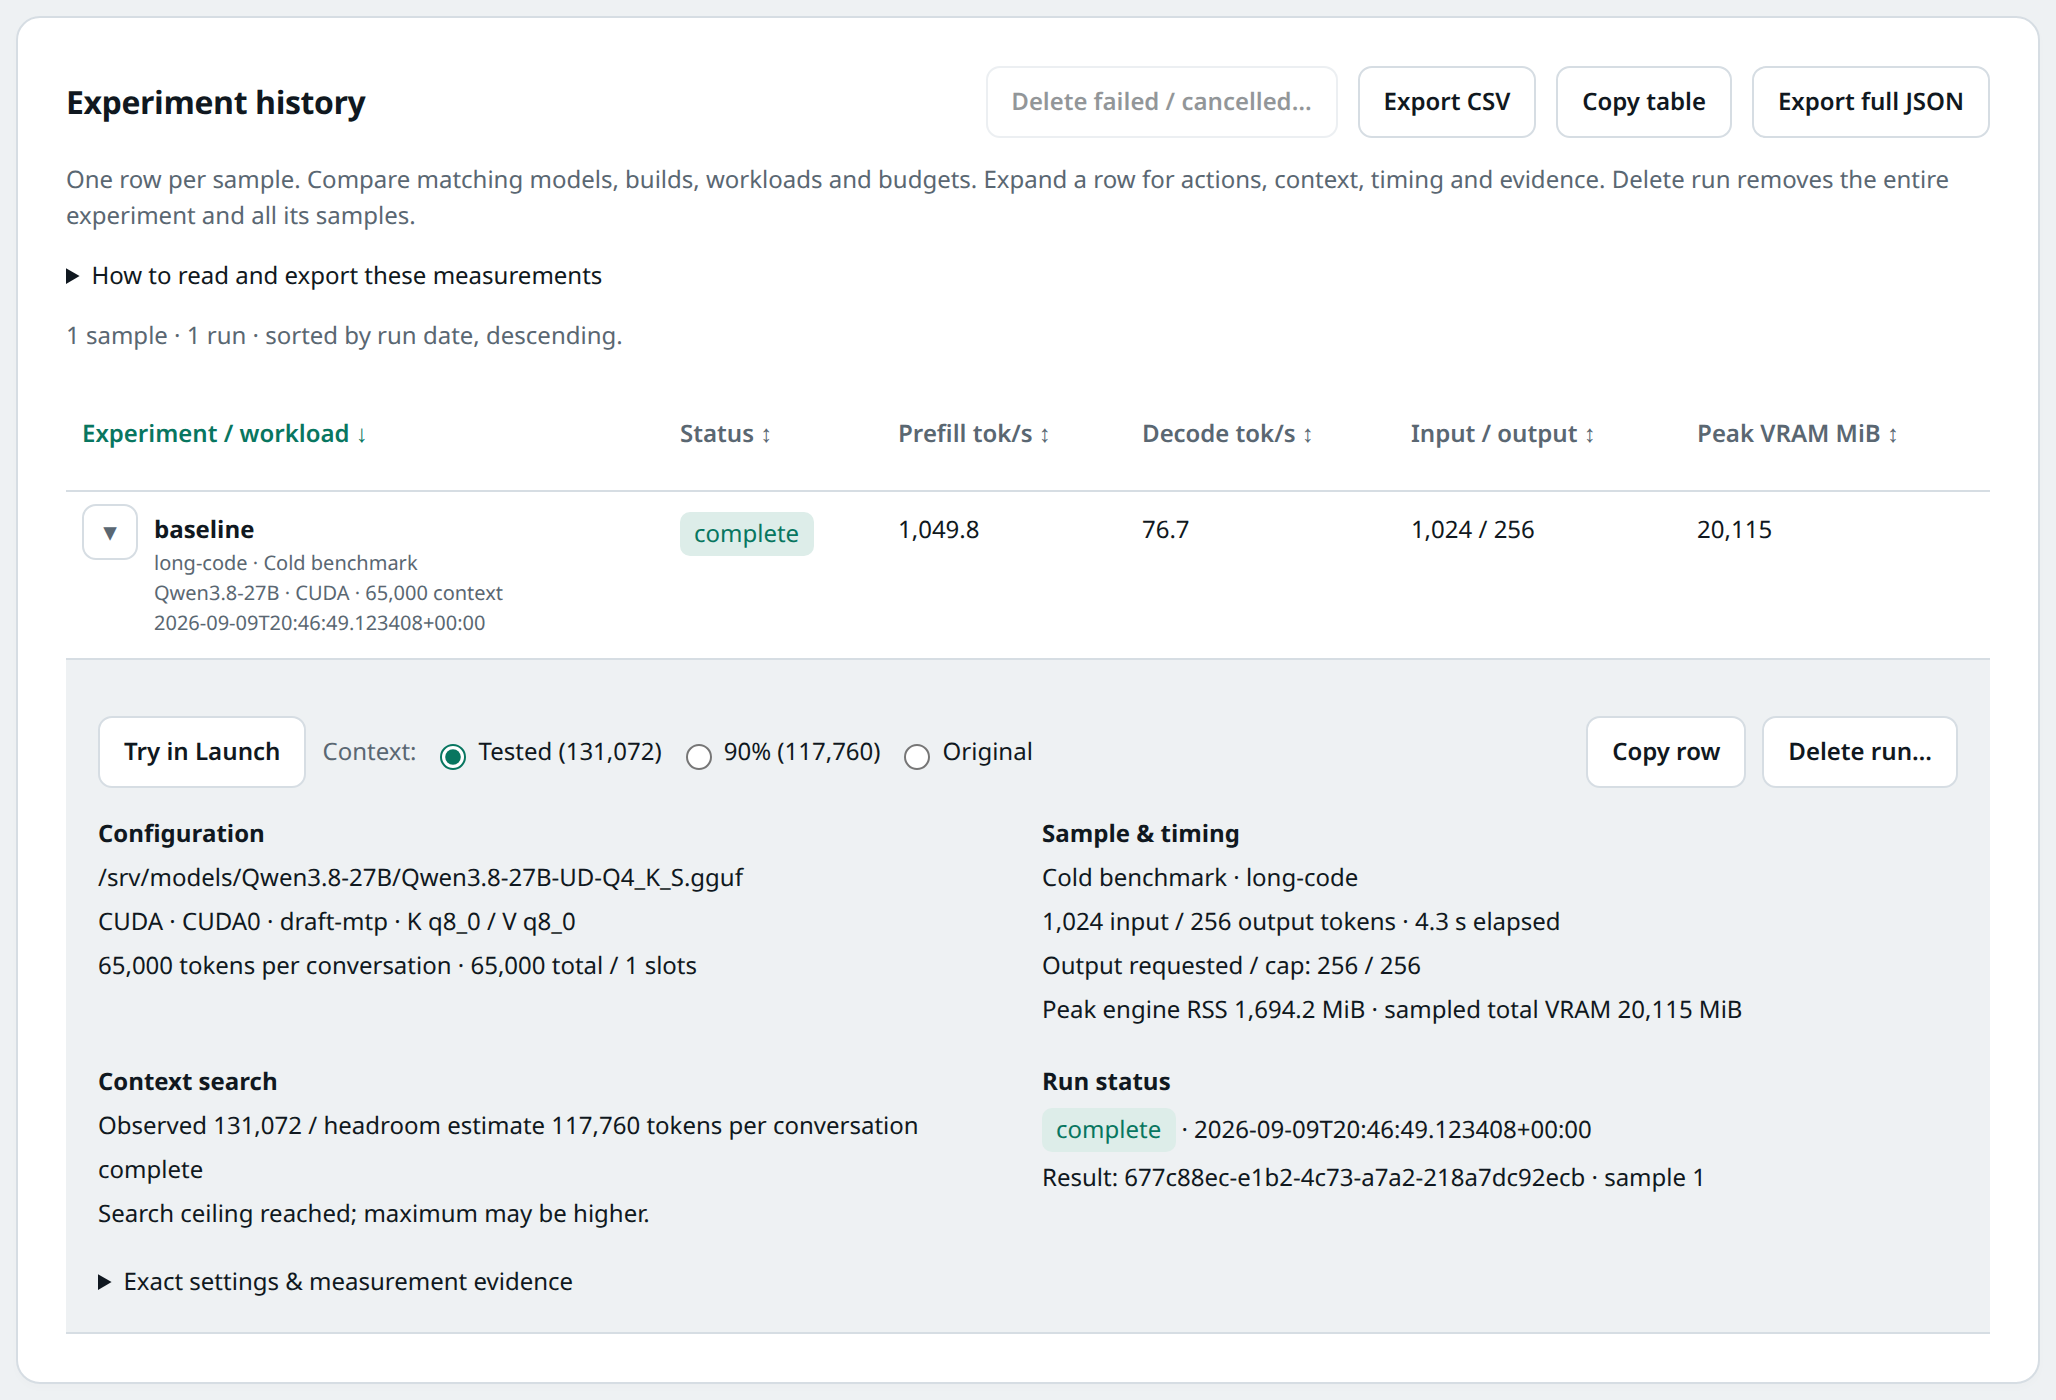
Try in Launch brings the selected settings back to the Launch view.#
In Launch model, find Save my settings beside Load settings, below the model controls. Save, then click Start Model above that settings toolbar. Wait until the panel reports the model is ready.
3. Run Pi#
Both ways of running Pi below use a sandboxed container and need rootless Podman on the machine. Check it works before continuing:
podman info --format '{{.Host.Security.Rootless}}'
This prints true when Podman is set up for your user. Pi finds the lllm2
model automatically in either case, so there is nothing to configure.
Quick: the claude-sandbox launcher#
For sandboxed interaction with your model without a devcontainer, use claude-sandbox’s launcher, described in its Use Pi guide. Open another terminal on the same machine, change to the project directory you want Pi to work in, and run:
uv tool install claude-sandbox && claude-sandbox pi
The first command installs the launcher and is needed only once.
The first run pulls the sandbox image. Your project is available to Pi at
/workspaces, and your Pi settings live in ~/.pi as usual. See
Run Pi in a container for the options.
Full: the claude-sandbox devcontainer#
For a complete development environment with Claude, Codex and Pi, use the
devcontainer instead. Configure VS Code’s Dev Containers extension to use
Podman by setting Dev › Containers: Docker Path to podman in its
settings. Then, in another terminal on the same machine, clone the sandbox and
open it in VS Code:
git clone git@github.com:DiamondLightSource/claude-sandbox.git
code claude-sandbox
In VS Code, press Ctrl+Shift+P (or choose View → Command Palette…), type Dev Containers: Reopen in Container, and select that command. Once the container opens, choose Terminal → New Terminal. This terminal runs inside the devcontainer; run Pi here:
pi
Start coding!
For later: run the panel as a service, upgrade lllm2, compare settings, or connect another client. Use Stop in the panel when you want to release the GPU.