Set Up a Cloudflare SSH Tunnel for Remote Cluster Access#
Note
When to use this guide. Use this guide when you want to reach the
cluster’s control-plane shell / kubectl from outside your LAN without
opening any inbound firewall ports. It adds an Access-gated SSH route on
top of the existing Cloudflare tunnel. Prerequisite: complete
Set Up DNS, TLS & Cloudflare Tunnel first so that cloudflared is running in the
cluster. For exposing web services through the tunnel (Grafana,
Headlamp, Open WebUI, ArgoCD), see Expose Web Services via Cloudflare Tunnel instead.
This guide walks through setting up secure remote access to your K3s cluster via an SSH tunnel through Cloudflare Zero Trust, without opening any inbound firewall ports.
Architecture#
CLIENT MACHINE
  │
  cloudflared access ssh --hostname ssh.example.com
  │  HTTPS to Cloudflare Edge (authenticated via Zero Trust policy)
  ▼
Cloudflare Zero Trust (identity verification + audit logging)
  │  Existing outbound tunnel
  ▼
cloudflared pod (in cluster)
  │  Forwards to node01:22
  ▼
node01 (<node01-ip>) SSH
  │
  kubectl / port-forward to any cluster service
Key security properties:
No inbound firewall ports are opened —
cloudflaredmakes outbound connections only.Cloudflare Access enforces identity verification (e.g. email OTP, GitHub, Google) before any SSH session is established.
All access attempts are logged in the Cloudflare Access audit trail.
Optionally, short-lived SSH certificates replace static keys entirely.
Two Cloudflare dashboards#
This guide uses two separate Cloudflare dashboards — it is easy to get confused between them:
dash.cloudflare.com — the main dashboard for managing DNS zones, WAF rules, tunnels, and general site settings.
one.dash.cloudflare.com — the Zero Trust dashboard for managing Access Applications and security policies.
The steps below will tell you which dashboard to use at each point.
Prerequisites#
A working Cloudflare Tunnel with
cloudflareddeployed in the cluster (see Set Up DNS, TLS & Cloudflare Tunnel).SSH enabled on
node01(it is by default after Ansible provisioning).cloudflaredinstalled on your client machine:
# macOS
brew install cloudflare/cloudflare/cloudflared

# Linux (Debian/Ubuntu) — install latest release directly
curl -L --output /tmp/cloudflared.deb \
  https://github.com/cloudflare/cloudflared/releases/latest/download/cloudflared-linux-amd64.deb
sudo dpkg -i /tmp/cloudflared.deb
Part 1: Add an SSH route to the tunnel#
First, add an SSH public hostname to your existing Cloudflare tunnel so that
traffic to ssh.example.com is forwarded to your control-plane node’s SSH port.
In the main dashboard (dash.cloudflare.com):
Navigate to Networking → Tunnels. You should see your existing tunnel listed as Healthy.
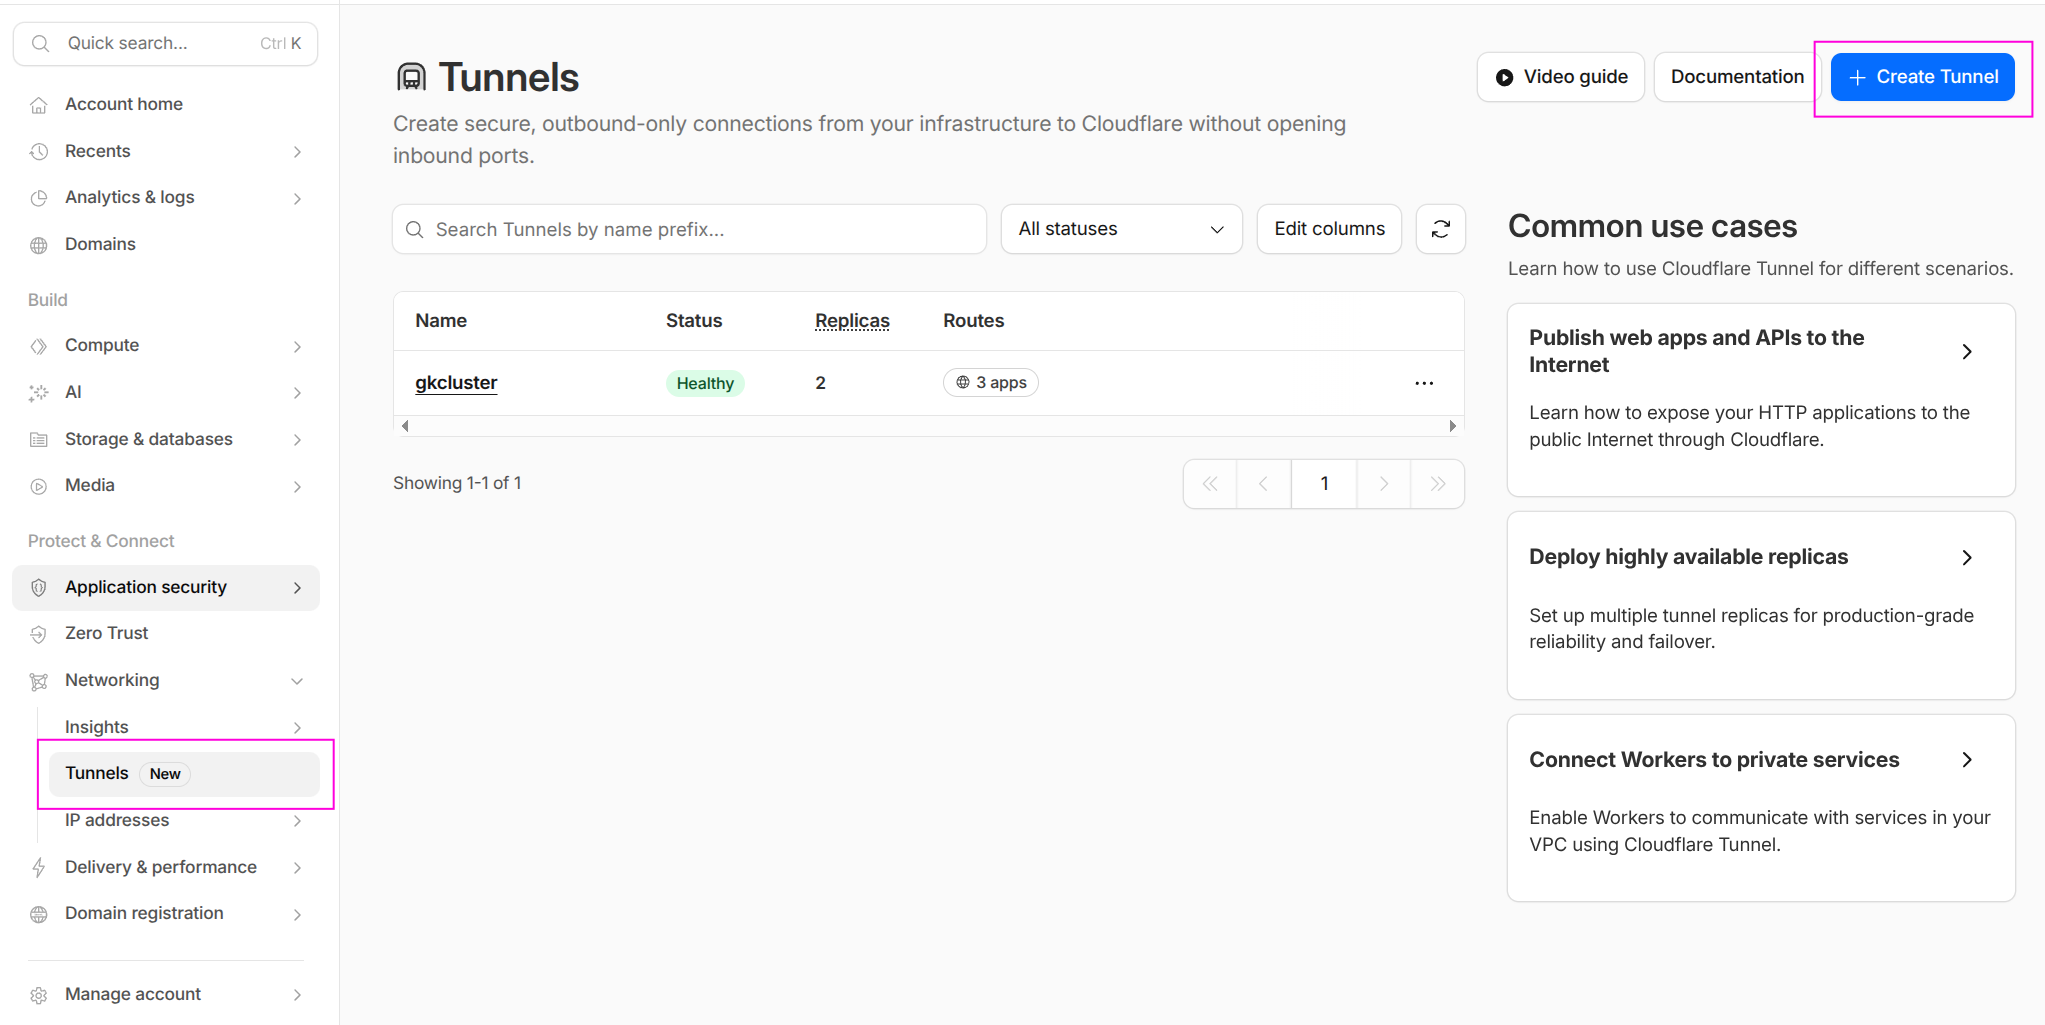
The Tunnels page showing the existing gkcluster tunnel with Healthy status.#
Click on your tunnel name to open the tunnel details.
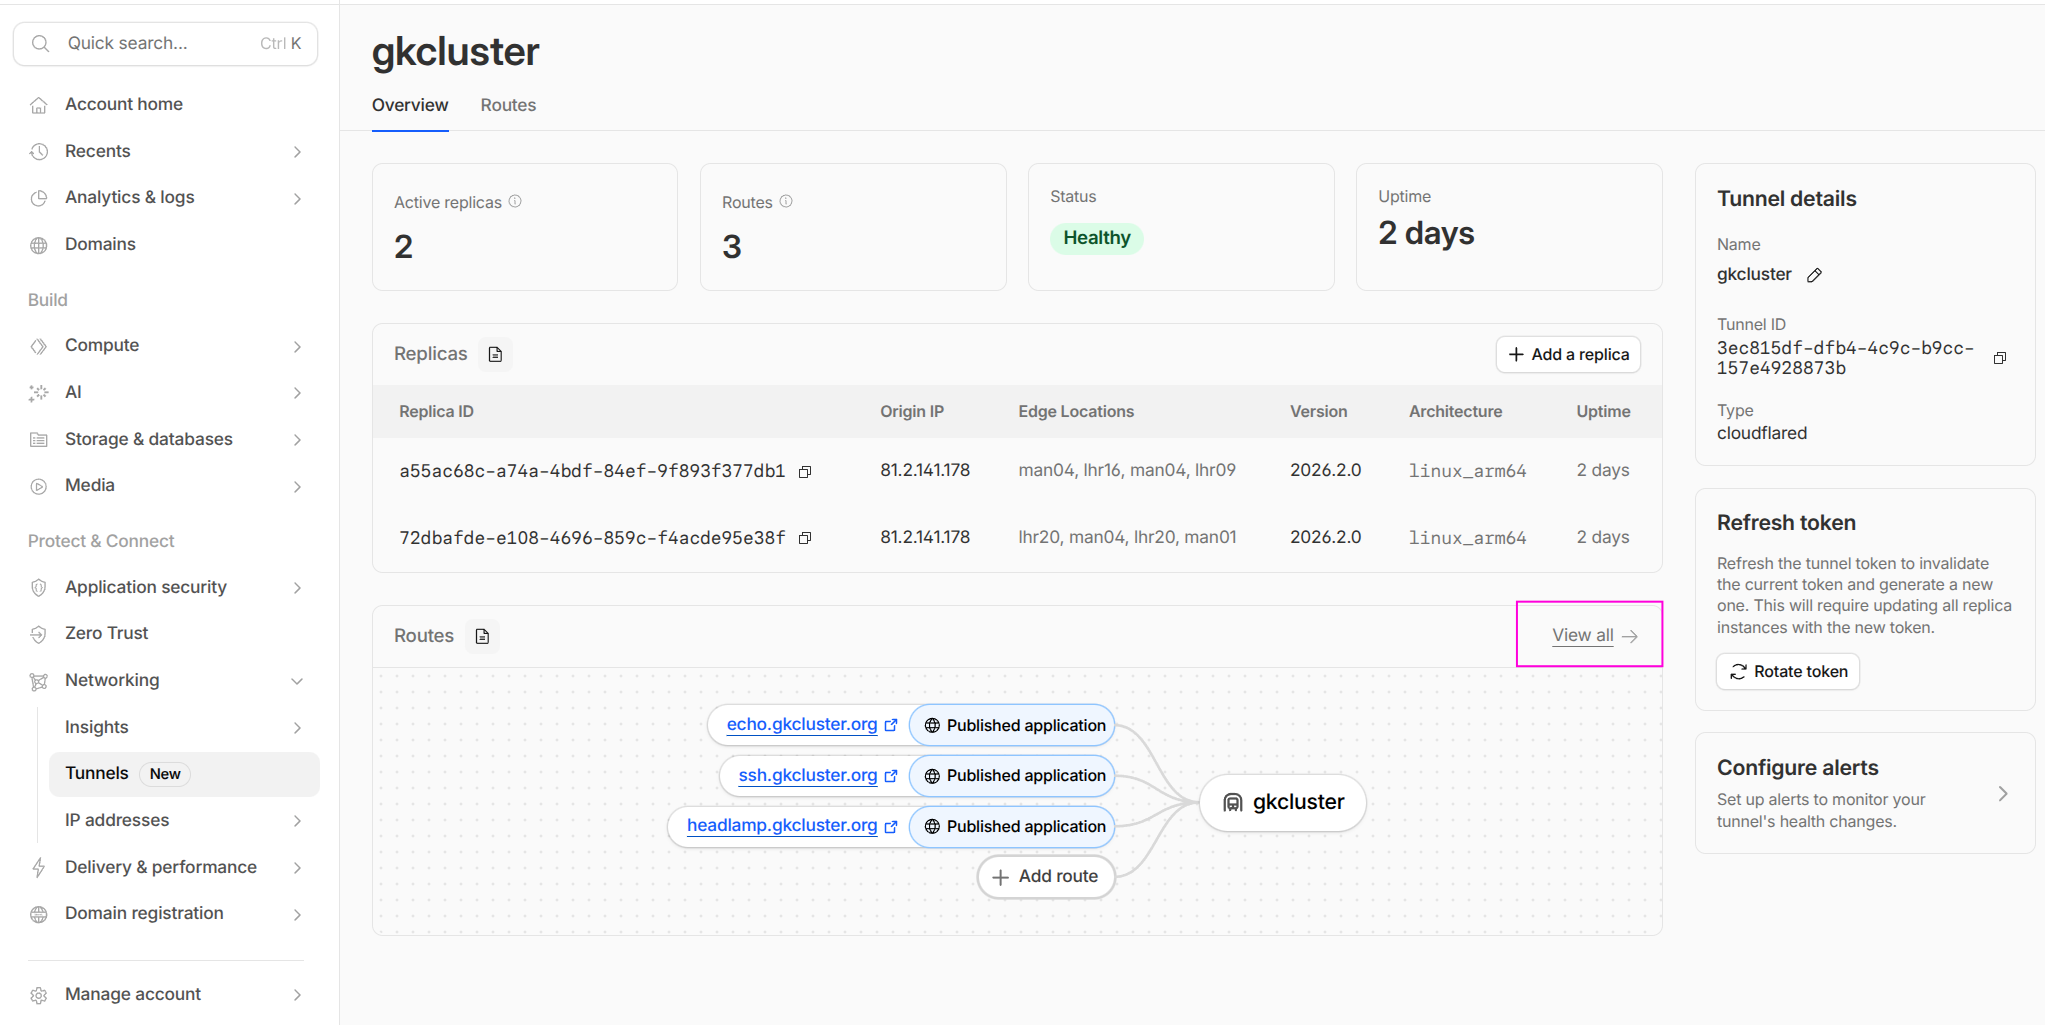
The tunnel overview shows active replicas, uptime, and published routes. Click View all under Routes to see the full list, or click Add a route to add the SSH hostname.#
Click Add a route (or go to the Routes tab and click Add route). Configure the new public hostname:
Field |
Value |
|---|---|
Subdomain |
|
Domain |
|
Service URL |
|
After saving, the Routes tab shows all published applications including the new SSH route alongside any existing services (echo, headlamp, etc.):
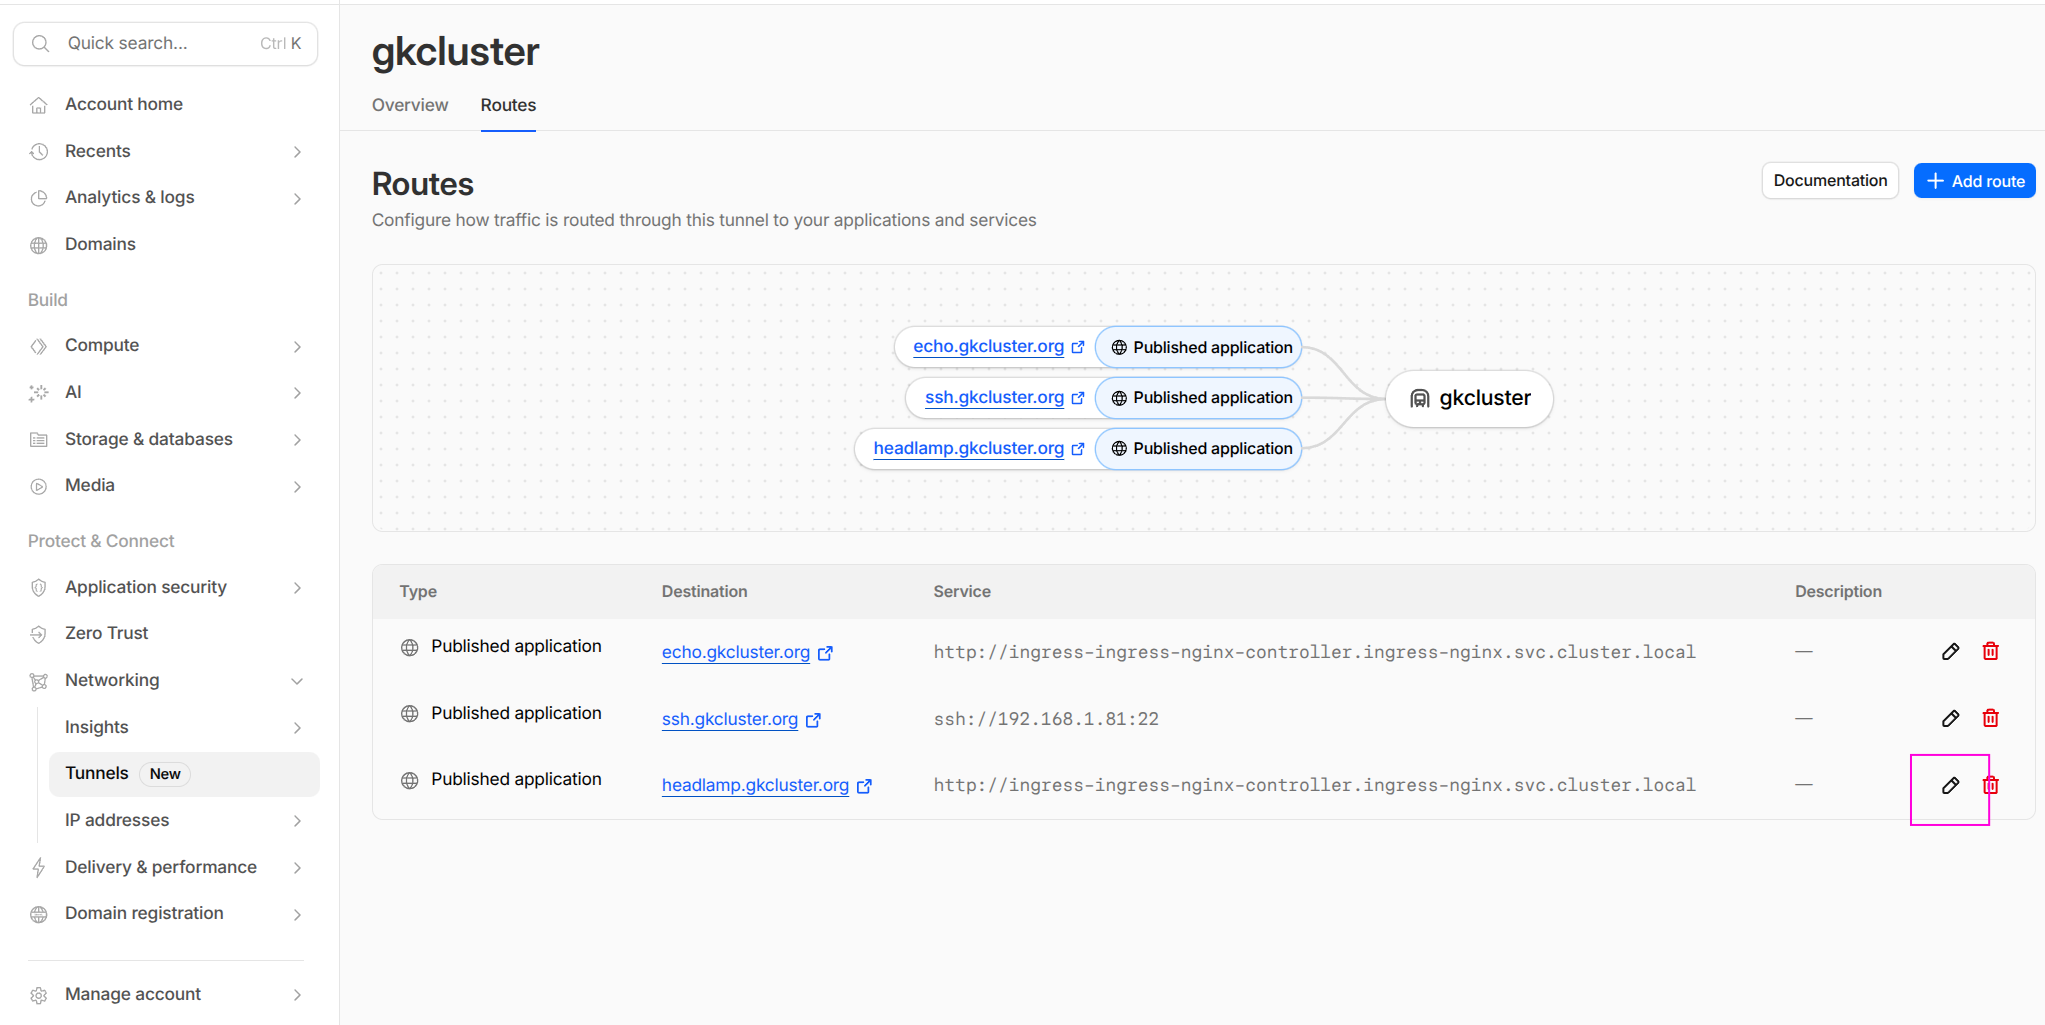
The Routes tab showing all published applications. The SSH route forwards to
ssh://192.168.1.81:22 on the cluster network. HTTP services route to the
ingress-nginx controller.#
Cloudflare automatically creates a proxied CNAME:
ssh.example.com → <tunnel-id>.cfargotunnel.com (Proxied ☁)
Note
The cloudflared pod resolves <node01-ip> from within the cluster network — it does
not need a DNS name, just a reachable IP. Using the control-plane IP directly is more
reliable than a hostname here.
Part 2: Create a Zero Trust Access Application#
This is the critical security gate. Without an Access Application, anyone with your DNS name could attempt connections through the tunnel. The Access Application enforces identity verification before any SSH session is established.
Still in the Zero Trust dashboard (one.dash.cloudflare.com):
Navigate to Access controls → Applications.
Click Add an application and select Self-hosted.
Configure the application:
Field |
Value |
|---|---|
Application name |
|
Session duration |
|
Domain |
|
Subdomain |
|
Path |
none (leave blank) |
On the Policies tab, create an access policy:
Field |
Value |
|---|---|
Policy name |
|
Action |
|
Include rule |
Emails → |
Warning
Keep this policy as restrictive as possible — ideally a single email address or a specific identity provider group. This policy is the primary security boundary.
Click Save application.
After saving, the Applications list shows your SSH application:

The Access Applications page showing the ssh application at ssh.gkcluster.org
with one policy assigned.#
You can review or edit the policy at any time by clicking the application name and selecting the Policies tab:
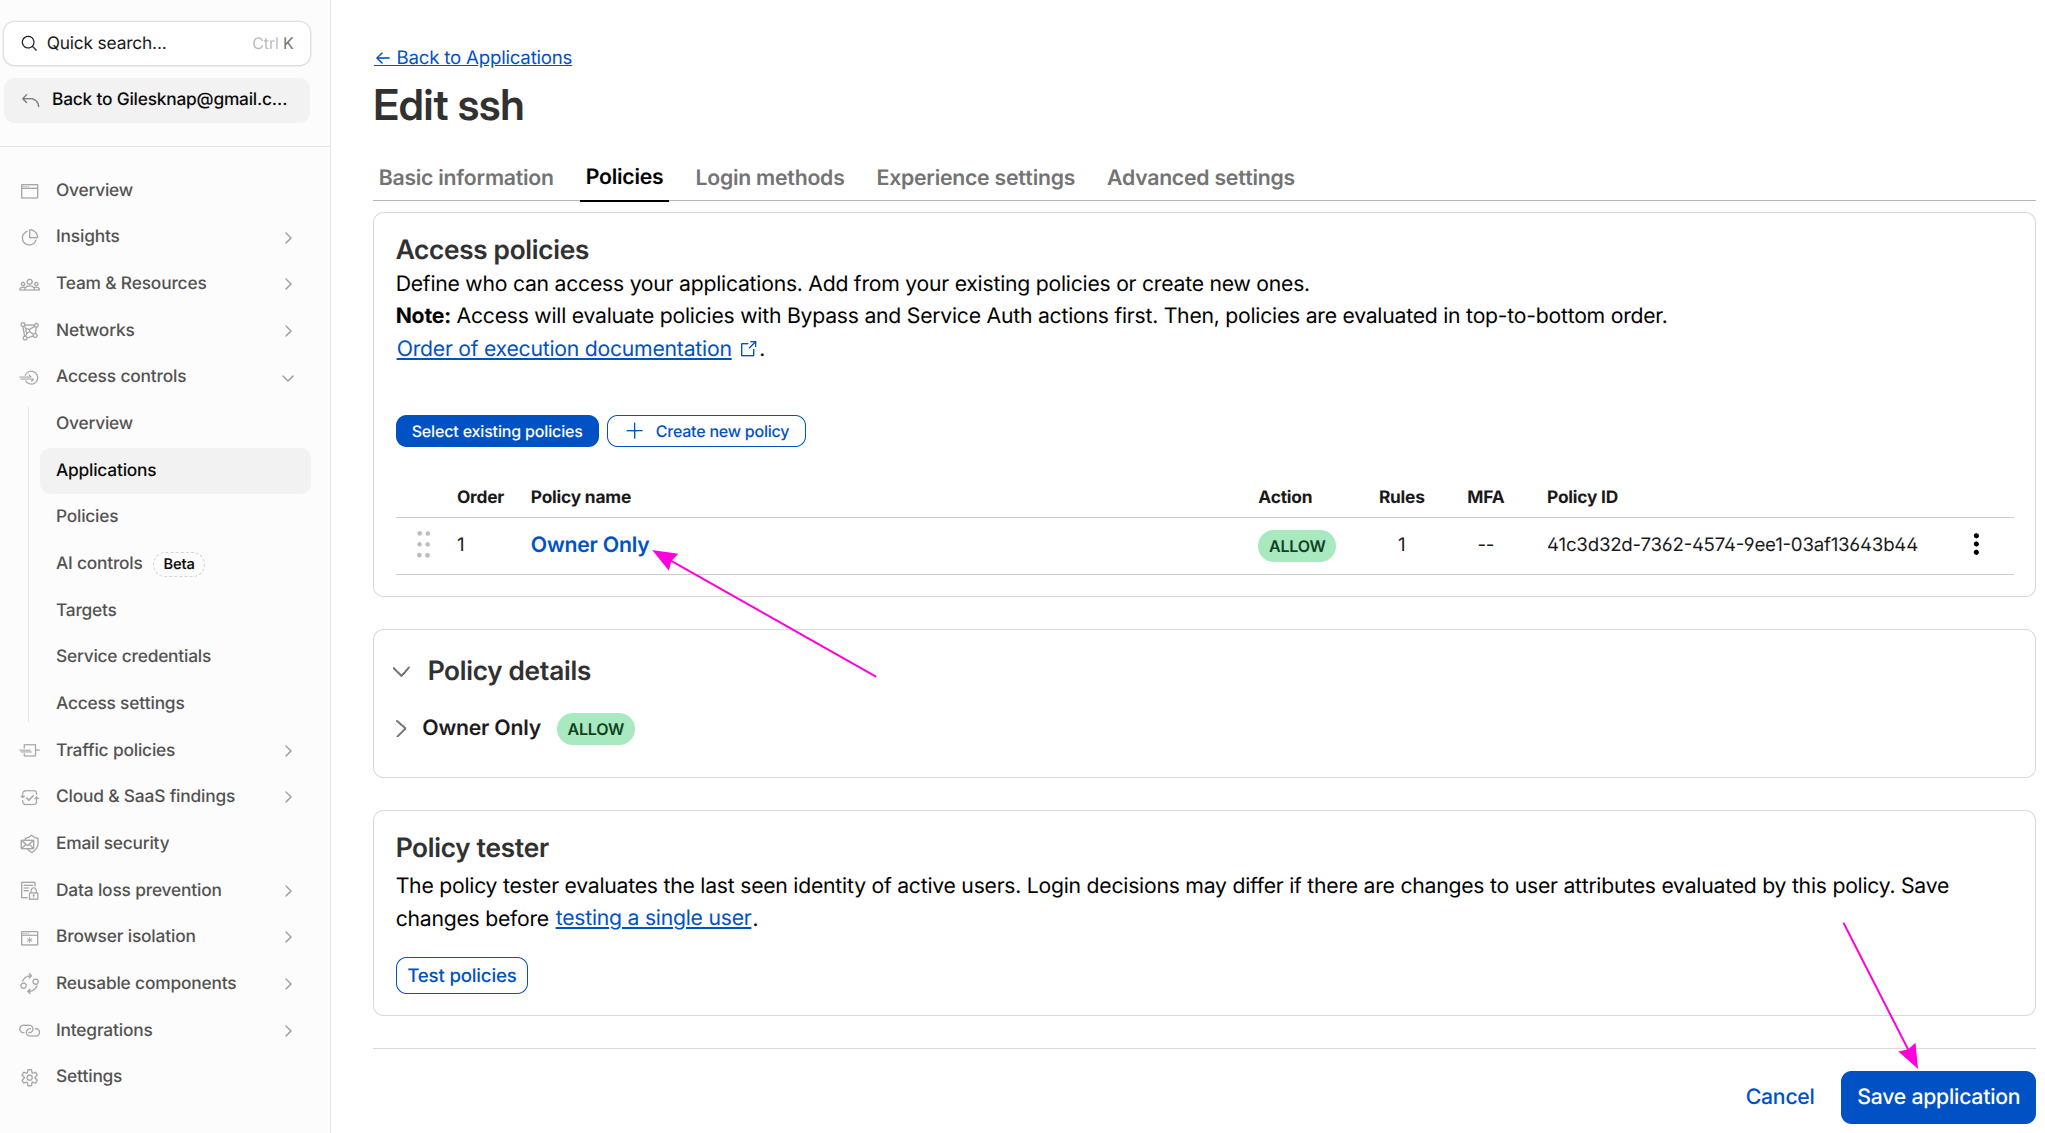
The policy editor showing the “Owner Only” ALLOW policy. Use the policy tester to verify your email is permitted before attempting to connect.#
Part 3: Add a WAF skip rule (if needed)#
Note
This step is only required if your Cloudflare zone has active WAF managed rules
or custom security rules. The free plan has no WAF rules enabled by default, so
most users can skip to Part 4. If cloudflared access login works without
this rule, you don’t need it.
If Cloudflare’s WAF is blocking requests to ssh.example.com before they reach
the Access Application — showing a “Why have I been blocked?” page or
failed to find Access application from cloudflared — add a WAF skip rule.
Switch to the main Cloudflare dashboard (dash.cloudflare.com):
Select your
example.comzone.Go to Security → Security rules (formerly WAF → Custom rules).
Click Create rule.
Configure:
Field |
Value |
|---|---|
Rule name |
|
Expression |
|
Action |
|
Under Skip, tick:
Skip all remaining custom rules
Skip all managed rules (WAF Managed Ruleset)
Click Deploy.
Part 4: Client SSH configuration#
4.1 Add a ProxyCommand entry to ~/.ssh/config#
Host ssh.example.com
    ProxyCommand cloudflared access ssh --hostname %h
    User ubuntu
    StrictHostKeyChecking no
4.2 Authenticate before first connection#
The ProxyCommand does not open a browser automatically. You must log in first
to cache a token:
cloudflared access login https://ssh.example.com
This opens a browser window for Cloudflare Access authentication. After authenticating,
a token is written to ~/.cloudflared/. The token is reused for the session duration
you configured (24 hours by default).
Warning
Parts 1 (tunnel route) and 2 (Access Application) must both be completed before this command will work. If either is missing you will see:
failed to find Access application— either the Access Application (Part 2) does not exist, or the hostname does not exactly matchssh.example.com. Check Access controls → Applications at one.dash.cloudflare.com. If the application exists but you still get this error, a WAF rule may be blocking the request — see Part 3.websocket: bad handshake— the tunnel hostname in Part 1 is missing, so Cloudflare has nowhere to forward the connection. Check Networking → Tunnels → Public hostnames.
4.3 Connect via SSH#
ssh ssh.example.com
Subsequent connections within the token’s session duration connect immediately without
re-authentication. When the token expires, re-run cloudflared access login first.
Part 5: Remote kubectl access#
Once the SSH tunnel is working, you can use it to reach the Kubernetes API remotely.
5.1 Copy and patch your kubeconfig#
# Copy kubeconfig from the control plane
scp ssh.example.com:~/.kube/config ~/.kube/k3s-remote.yaml

# Patch the server address to use a local forwarded port
sed -i 's|https://<node01-ip>:6443|https://127.0.0.1:6443|' \
    ~/.kube/k3s-remote.yaml
5.2 Forward the Kubernetes API port and use kubectl#
# Start the port forward in the background
ssh -fNL 6443:<node01-ip>:6443 ssh.example.com

# Use the remote kubeconfig
export KUBECONFIG=~/.kube/k3s-remote.yaml
kubectl get nodes
Expected output: your cluster nodes in Ready state.
Part 6: Verification#
Confirm Access policy is enforced#
Visit https://ssh.example.com in a browser — you should be redirected to the
Cloudflare Access login page, not an SSH banner. If you see a plain error page,
check Access controls → Applications at one.dash.cloudflare.com
to confirm the application exists and its hostname matches.
Test the SSH tunnel#
ssh ssh.example.com echo "tunnel ok"
Expected: tunnel ok printed after authentication.
Check cloudflared logs in the cluster#
kubectl logs -n cloudflared deployment/cloudflared | tail -20
Look for connections referencing ssh.example.com.
Confirm the node is NOT directly reachable from outside your LAN#
From a mobile hotspot (off your home network):
ssh ubuntu@<node01-ip>
# Expected: connection refused or timeout — direct access is blocked
The node is only reachable via the Cloudflare tunnel with a valid Access session.
See also#
Set Up DNS, TLS & Cloudflare Tunnel — Setting up the base Cloudflare tunnel
Set Up OAuth Authentication — In-cluster OAuth authentication as an alternative to Cloudflare Access