User Login OAuth Flow
The first time you run gphoto-sync against a given root folder you will be prompted to log in as the user who’s photos you wish to backup into that folder.
For a discussion of authentication see Google OAuth Tokens for gphotos-sync.
The User token will be saved in the root folder (as .gphotos.token) and
you will not be prompted again. Although the token expires it is configured
to refresh automatically.
Note that this means you can backup multiple users on the same machine simply by specifying a different folder for each user.
When you first run gphotos sync it must be on a workstation that you can run a browser on. This is because the authentication flow uses a temporary local web server and Google’s login pages.
On first run (or when the .gphotos.token has been deleted) you will see output like this:
`Please visit this URL to authorize this application: https://accounts.google.com/o/oauth2/auth?re... [url clipped]`
Most modern terminals will let you <ctrl> click on the link to launch your browser, if this does not work then copy the URL and paste into your browser.
You should now see:
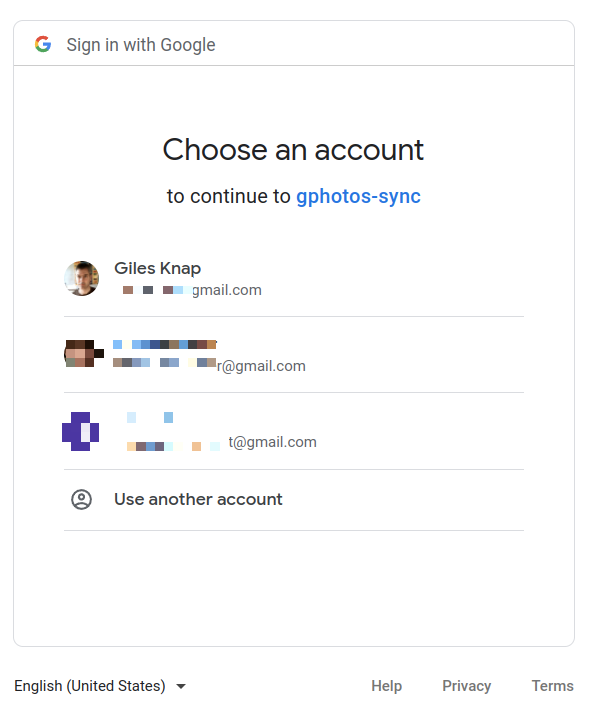
Choose the user you want to backup photos for. Or pick ‘Use Another Account’ if they are not shown.
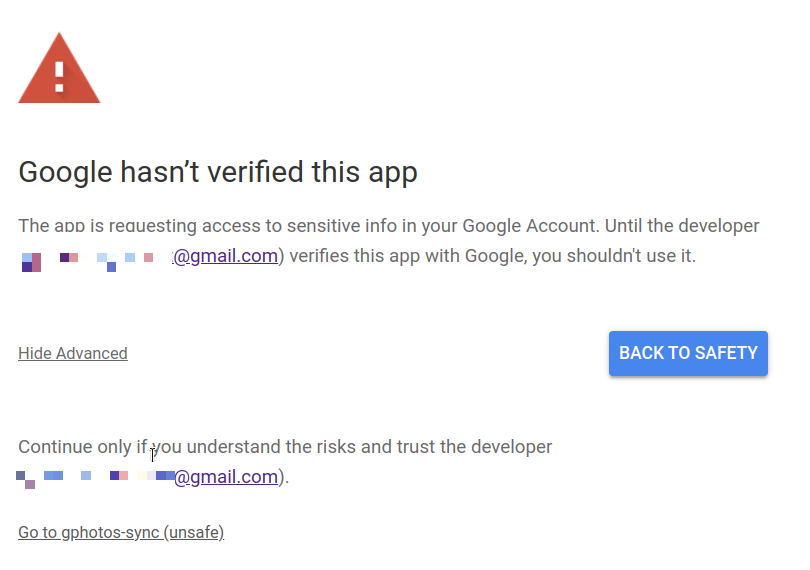
You will be presented with a warning because you have made your own client ID which is not verified by Google. This is expected for this application (see Google OAuth Tokens for gphotos-sync).
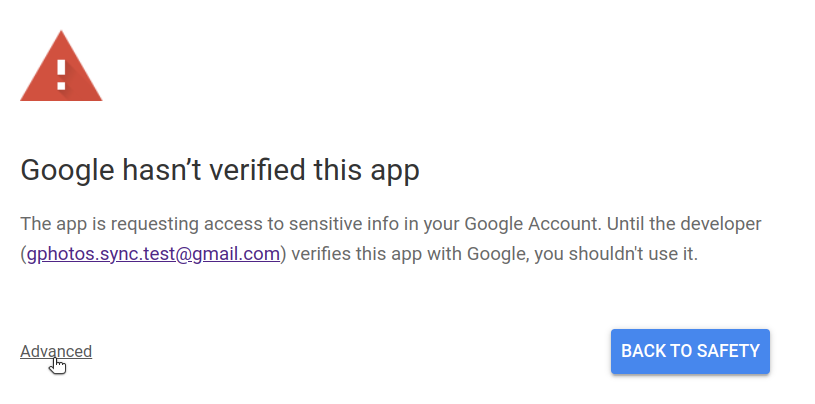
Click ‘Advanced’ and then ‘go to gphotos-sync (unsafe)’.
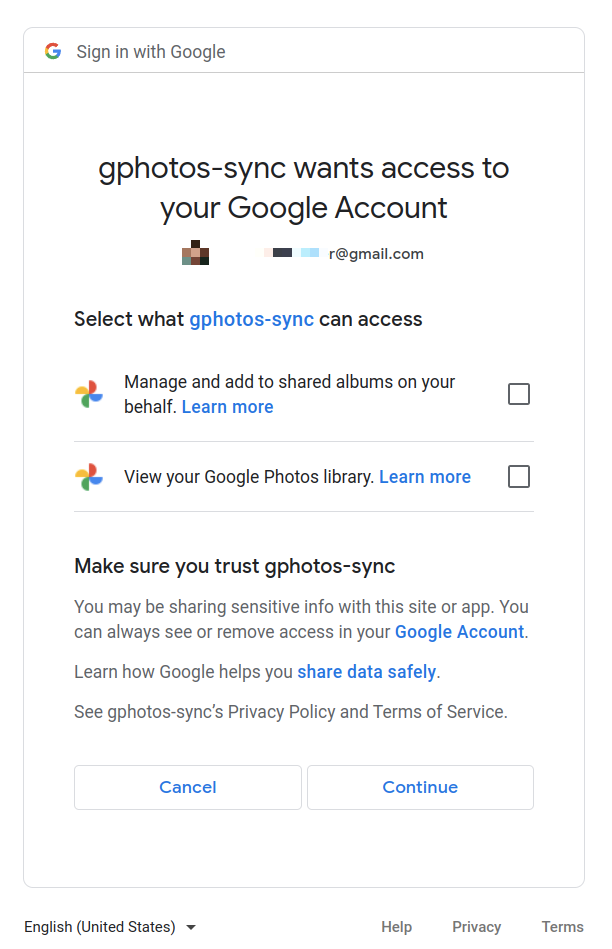
The next screen shows you the permissions you may grant to this application. Tick all the boxes and click ‘Continue’. The command line gphotos-sync will then continue to run and start to backup the user’s library.