Creating an OAuth Client ID
Overview
This document will take you through the steps needed to set up a Google Cloud project and create an OAuth client ID for gphoto-sync.
For a discussion of the purpose of this ID see Google OAuth Tokens for gphotos-sync.
Each step here assumes that you’re logged into a personal Google account.
Note
The steps outlined here are correct as of May 2022. Their is quite a bit of churn in the Google Cloud Console UI so the screens may change a bit.
Create a Google Cloud Project
Head to https://console.cloud.google.com
If you have not set up Google Cloud before, select your country and agree the to the Terms of Service.

In the top banner the currently selected project is shown. If you have no previous projects this will say ‘Select a project’
Click on the current project name or ‘Select a project’
This will bring up the ‘Select a Project’ dialog
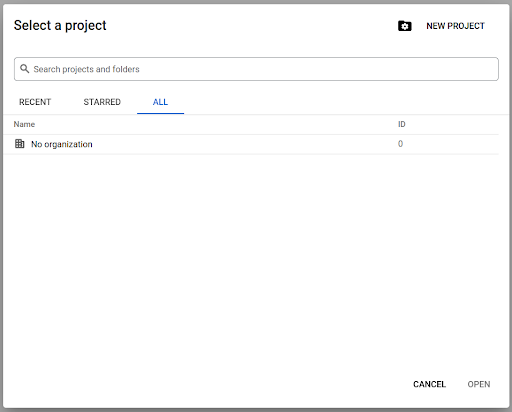
Press New Project.
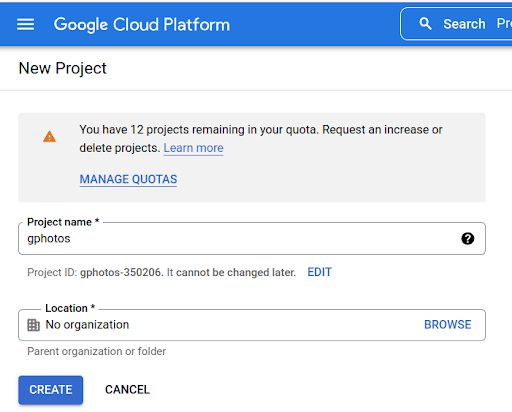
Enter a project name. For example, “gphotos”. This name must be unique within your account and cannot be changed in the future.
Leave Location as the default “No Organization”.
Press Create.
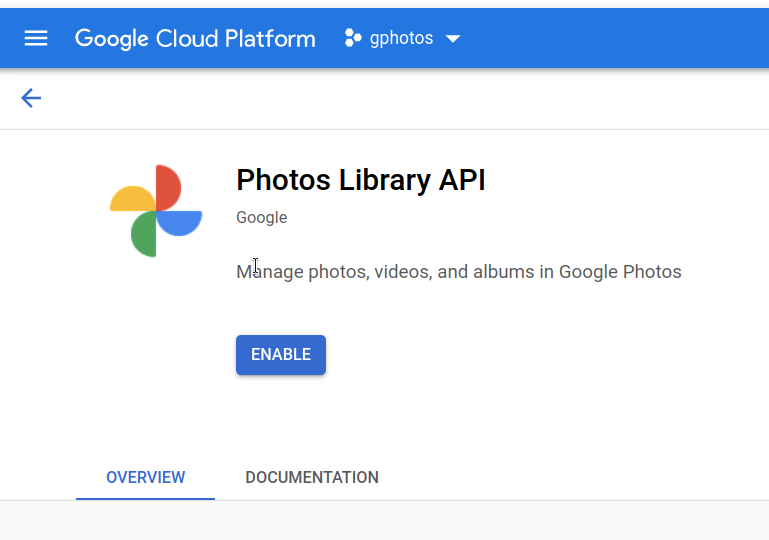
Enable the Photos API
Ensure that the project you made above is the active project.
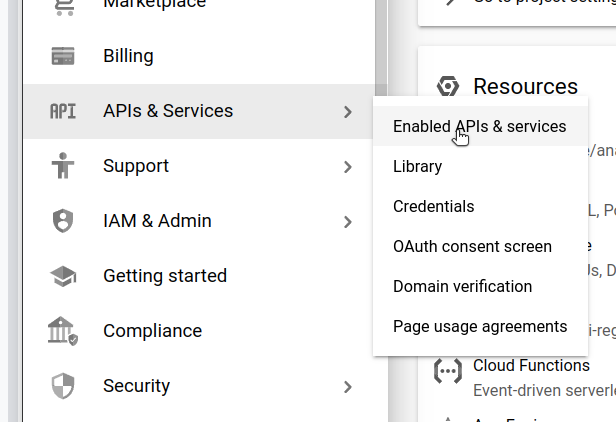
Click on the top-left hamburger menu and find APIs & Services > Library.
- Search for the Photos Library API by Google and select it.
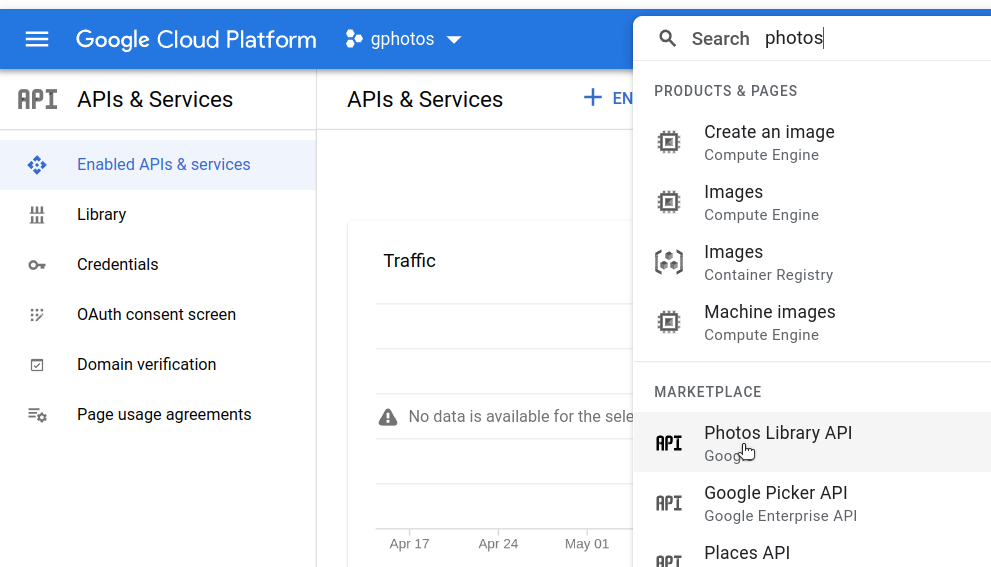
Enable it.
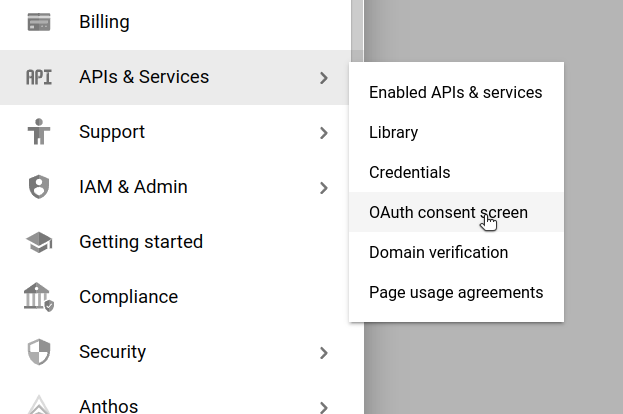
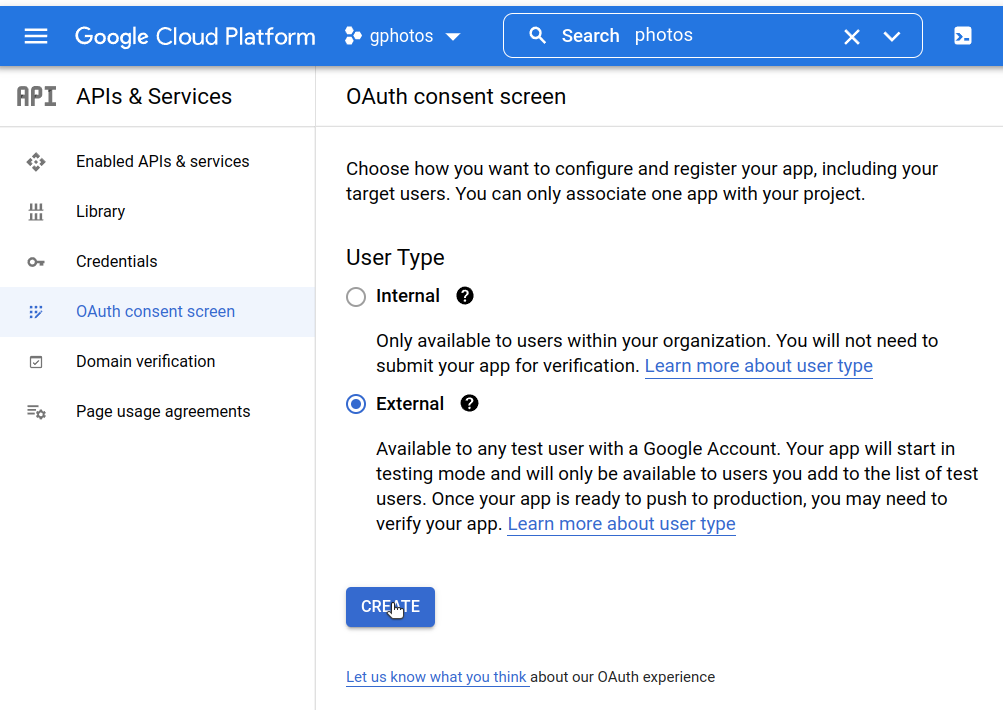
Configure OAuth Consent
Find APIs & Services > OAuth consent screen
Set User Type to External.
Press Create
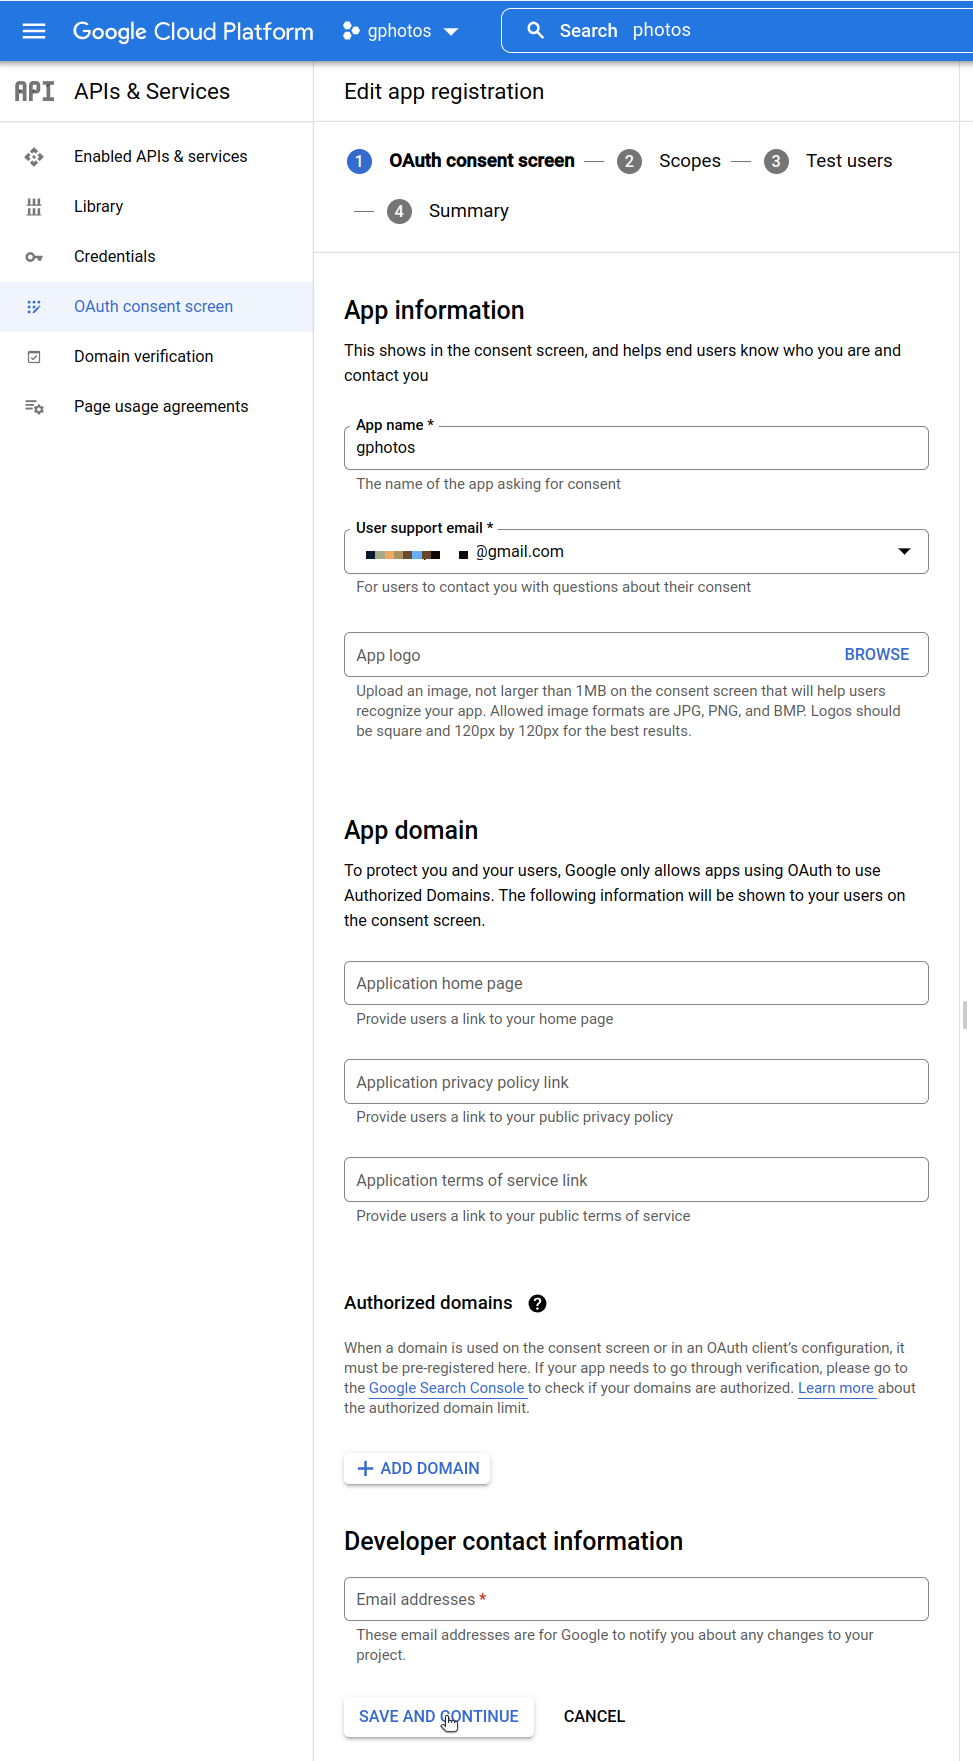
App Registration - OAuth consent screen:
Set your App Name. For example, “gphotos”. Note that this does not have to be the same as the project name. Do not include “Google” in the name or this will fail.
Enter your email address as the User support email.
Enter your email address as the Developer contact information.
Leave all other fields.
Press Save and Continue.
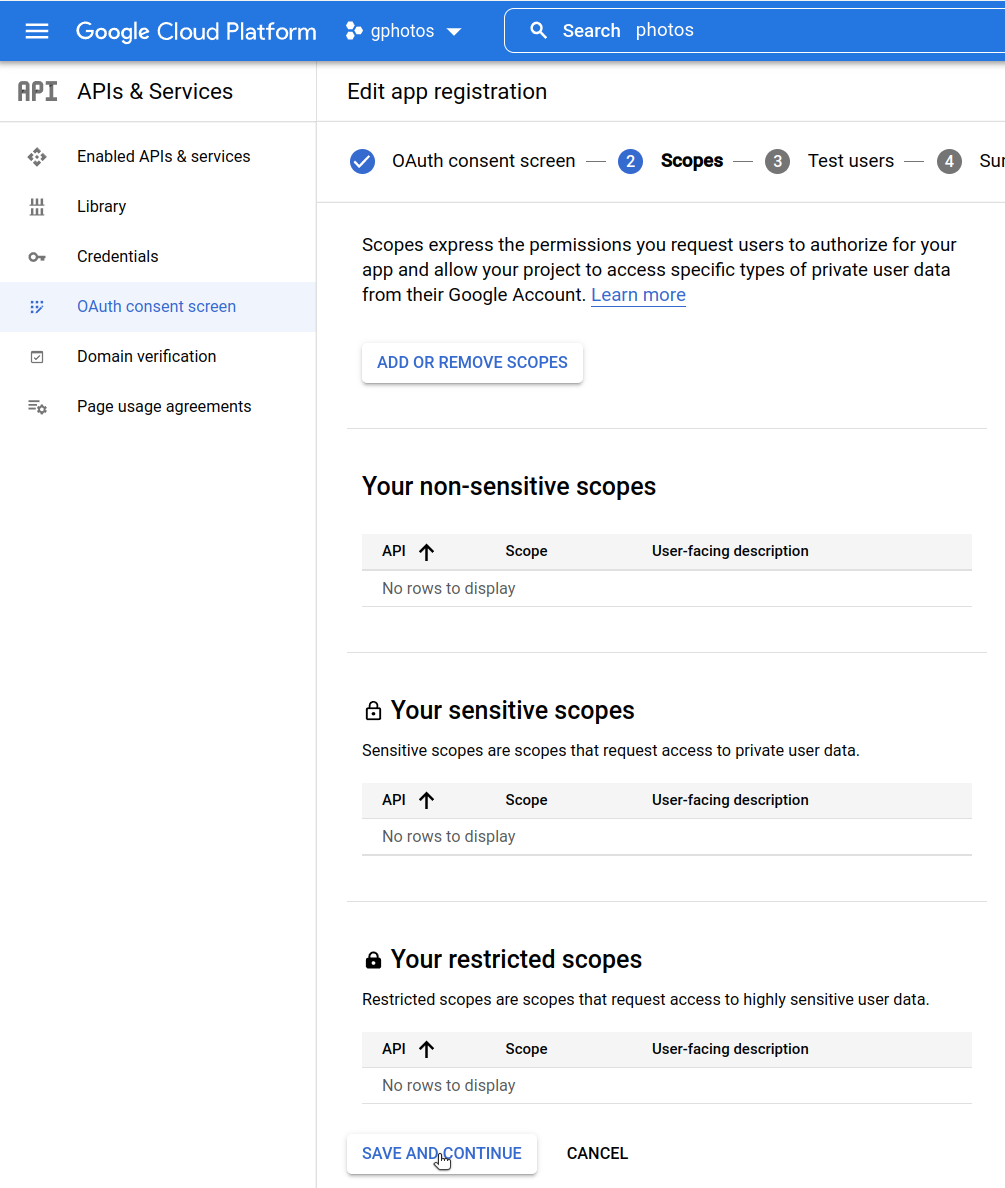
App Registration - Scopes
Nothing is needed here - you can just ignore everything and press Save and Continue.
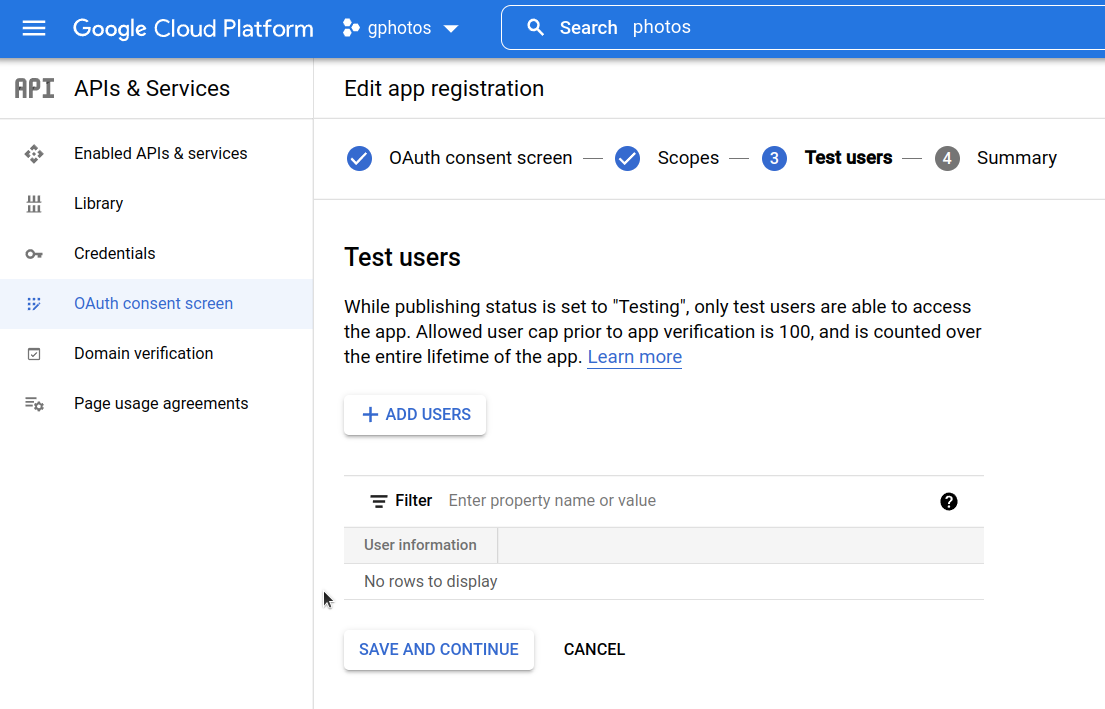
App Registration - Test Users:
Nothing needed here as you are going to publish the project. This means it will no longer be in the testing state.
Press Save and Continue.
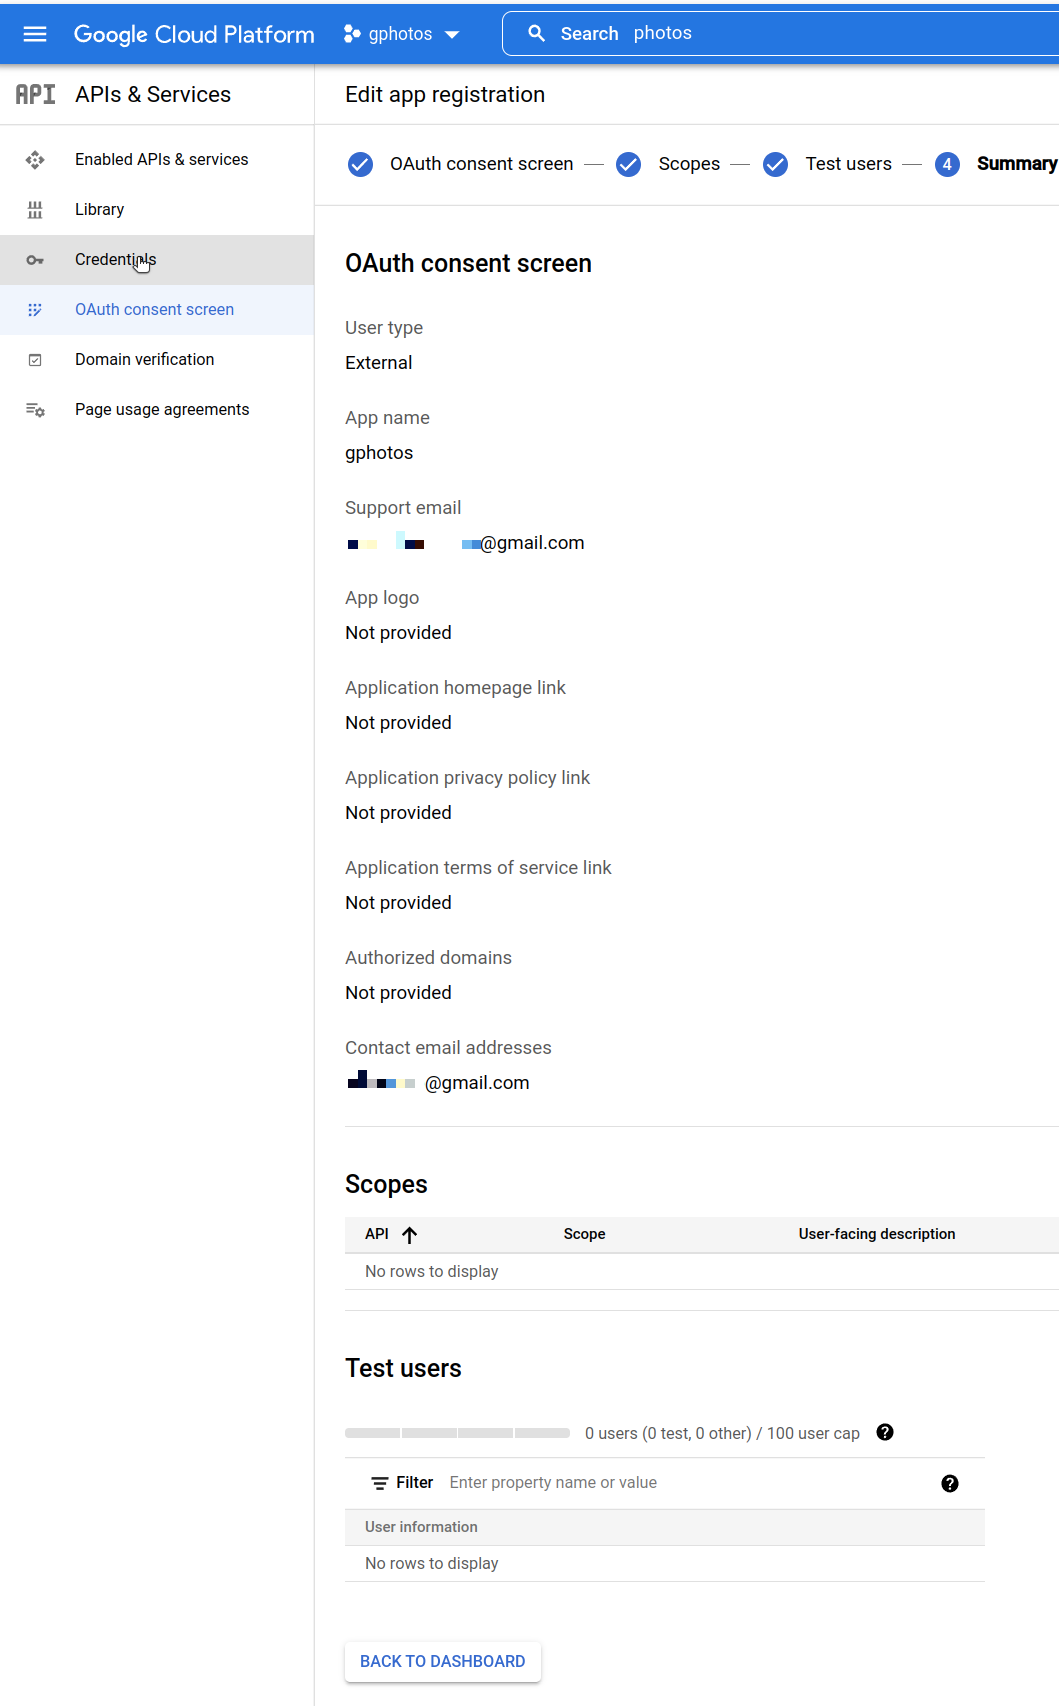
Summary
You will now see a summary screen like this
Review the summary and press Back to Dashboard.
Create the OAuth Credentials
Find APIs & Services > Credentials
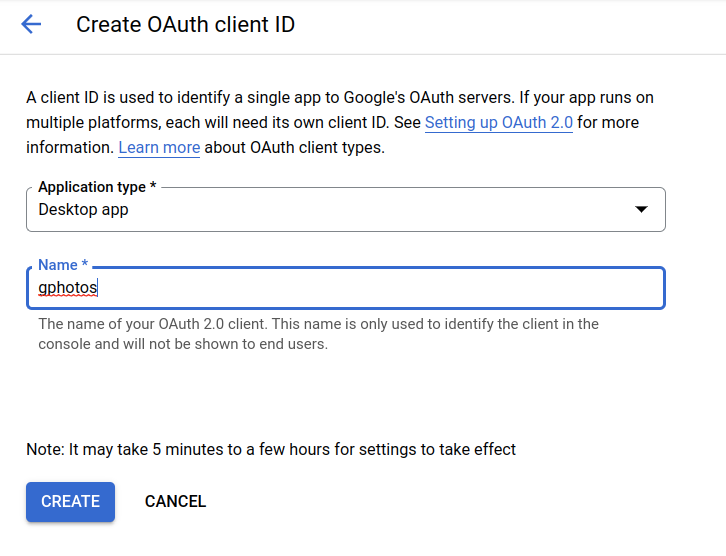
Press + Create Credentials and select OAuth client ID.

- Choose Desktop App
Choose name for your credentials e.g. gphotos
Click Create
Click Download JSON to download the OAuth client ID as JSON and save it as
client_secret.json.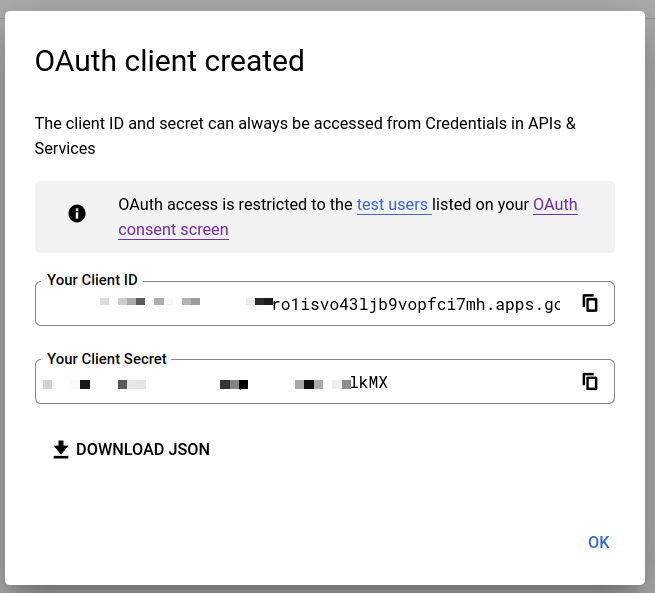
Publish the App
Important
Failure to publish the app will result in your auth token expiring after 7 days. See the Google Cloud docs and Issue #290 for details.
Head to APIs & Services > OAuth consent screen
Press Publish App.
Read the notice and press Confirm.
At this point you should be able to run gphotos-sync using the instructions
found in the README.
Move client_secret.json
The client_secret.json must be moved to the correct location
Each supported operating system has a different location where it will look for this file.
Return the Initial Setup for details of where to put this file.